Yeah loving the twist to the right and the change of filter......
And really like the delay cut, gonna dig into that as i'd like a little more prominent start if possible so it resembles my old echo kill rack that i used with my padKontrol.... Looking at the ALP next.....
Cheers
D
[SHARE] Full DJ Template - Isotonik
-
JuanSOLO
- Posts: 3236
- Joined: Sun Jul 15, 2007 8:21 am
- Location: Shreveport LA, sometimes Dallas/Ft Worth TX
Re: [UPDATE 11] Max4Live - DJ Edition (Kills & Send Control)
Yeah the delay cut needs work. I actually tried making that modeled after a delay cut thing on a reaktor ensamble called "ToxonicGlitch." However I made that delay cut when I first started learning M4L. Theres got to be a better way, one that is smoother sounding, some kind of animation curve. I just haven't revisited it in months. In the ToxonicGlitch version it has the ability to be a ping pong style delay, and it sounds super clean.
The thing I need to learn about the delay cut is making the cut time synced to the transport, so once it's hard coded to sound good, it will always sound good.
The thing I need to learn about the delay cut is making the cut time synced to the transport, so once it's hard coded to sound good, it will always sound good.
Re: [UPDATE 11] Max4Live - DJ Edition (Kills & Send Control)
yeah thatd be way cool, i'd have that straight into the patch!
Cheers
D
Cheers
D
Re: [UPDATE 12] Max4Live - Isotonik
Update 12:
I've just posted a setup guide on my blog but in summary i've ironed out some of the glitchy bugs, made the beatjumps light up properly, incorporated the clip mapper from hoffman2k and made the Activator/Cue/RecArm buttons totally configurable per the five scenes giving you up to 8 different sets of controls (more in the video)
http://darrencowley.blogspot.com/2010/0 ... guide.html
I'll upload this later in the week when a few kinks have been ironed out but the video below acts as a guide to those of you that have downloaded the device from Max4live.com and want to know how to set it up properly, there's no audio demonstration as if you follow the instructions you'll be glitching and controlling your own sets in next to no time.....
For the next update i intend on mimicing the way you can choose different control options for each scene for the Activator.cue.recarm buttons and create your own setups for the device but for the scene launch controls.... As i've pretty much exhausted everything i wanted the device to do i'd happily take suggestions of what else i can program. Basic rule is that there are five buttons per scene and i've got 5 scenes left to create....
So far i have these three sets of controls....
- 5 x Scene Launch Buttons (Standard functionality of the APC40)
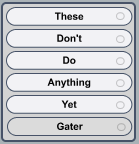
- 4 beatrepeats and a synced gater (that cuts out every other repeat when pressed)
- A High, Low and Mid Kill plus a Filter slide Up and Down button
Answers on a postcard, i'm thinking maybe some loop controls so you can combine them with the beatjumps but what else, what would you like to see?
Cheers
D
I've just posted a setup guide on my blog but in summary i've ironed out some of the glitchy bugs, made the beatjumps light up properly, incorporated the clip mapper from hoffman2k and made the Activator/Cue/RecArm buttons totally configurable per the five scenes giving you up to 8 different sets of controls (more in the video)
http://darrencowley.blogspot.com/2010/0 ... guide.html
I'll upload this later in the week when a few kinks have been ironed out but the video below acts as a guide to those of you that have downloaded the device from Max4live.com and want to know how to set it up properly, there's no audio demonstration as if you follow the instructions you'll be glitching and controlling your own sets in next to no time.....
For the next update i intend on mimicing the way you can choose different control options for each scene for the Activator.cue.recarm buttons and create your own setups for the device but for the scene launch controls.... As i've pretty much exhausted everything i wanted the device to do i'd happily take suggestions of what else i can program. Basic rule is that there are five buttons per scene and i've got 5 scenes left to create....
So far i have these three sets of controls....
- 5 x Scene Launch Buttons (Standard functionality of the APC40)
- 4 beatrepeats and a synced gater (that cuts out every other repeat when pressed)
- A High, Low and Mid Kill plus a Filter slide Up and Down button
Answers on a postcard, i'm thinking maybe some loop controls so you can combine them with the beatjumps but what else, what would you like to see?
Cheers
D
-
mr.ergonomics
- Posts: 919
- Joined: Thu Nov 08, 2007 3:12 am
Re: [UPDATE 12] Max4Live - Isotonik
- delete -
was nothing important, my fault
was nothing important, my fault
Re: [Final UPDATE ] Max4Live - Isotonik
Well i've hit a massive brick wall, i have so many other ideas for what i want to be able to do with the device including the choice of functions of the scene launch buttons independant of the stop clip buttons....
But....
Now that i've brought the slave device up to the latest version i can only use the master and three slaves before i run into out of memory crashes, i can load a device on all eight tracks but it will crash Ableton after about an hour of use which is just not good enough.
I've had to delete around 6000 objects to slim down the device so anyone out there doing M4L stuff watching their patch grow, take my advice, avoid send and receive objects unless absolutely neccesary! I had hundreds of them because i thought it would make things look tidier without loads of patch cords all around the place!
I'm just uploading my Live Set as a template for people who just want to plug in and go however the Master and Slave Isotonik devices (Version 4.3) have been uploaded to max4live.com for anyone that wants to build them into an already existing template...
Place the master on track one, the slaves on 2,3 and 4 and then work through them sequentially....
Double click to load the device and then choose the rack that you want the right hand knobs to control, turn the knobs to the values you want to reset to and click the red record button.
Double click the 1st tab on the left hand knobs of the master and you'll take control of the 1st rack in each of your first 8 tracks of your live set. Pressing metronome and the track slects buttons will choose the paramater you want to control. Midi map these knobs to the pan bank on the APC and work through the parameters saving the reset values with the red record tab for the right hand set after recording press reset each time, this can be done by pressing metronome and master select on the APC. Once all 8 have been recorded and reset click the red record tab on the right hand set of knobs and this should save the values into the master preset.
Now repeat the process for each of the slaves with regards to loading and choosing the control of the right hand knobs.
To change the functionality of the stop clip buttons press metronome and the scene launch buttons, on the master device bring up the send control option as a floating window. As the "Fist" scene sends audio to up to 8 sends you can use this element to be a set of automap knobs to the send itself. Enable learn mode and set up what you want the knobs to control, i have the 9th audio track set up with 8 clips in it, with the numbers on the enable learn mode you want something like 9 1 1 which would be the 9th track 1st clip and 1st send. This will then take control of the rack in send one when you fire audio from the "Fist" scene to send 1.
To change the functionality of the Activator/Cue/Rec Arm buttons press metronome and a clip stop button. Most of the functions work currently apart from the EQ Kills which needs some work!
To change the global launch quantize and the behaviour of the follow action press the rec quantize button on the APC and use the clip stop buttons....
Thats it for now, unlikely to be another update as i've done my bit so thanks for the feedback!!
I'll continue to work on Lite versions with restricted functionality with the people on the list that have contributed......
Cheers
D
But....
Now that i've brought the slave device up to the latest version i can only use the master and three slaves before i run into out of memory crashes, i can load a device on all eight tracks but it will crash Ableton after about an hour of use which is just not good enough.
I've had to delete around 6000 objects to slim down the device so anyone out there doing M4L stuff watching their patch grow, take my advice, avoid send and receive objects unless absolutely neccesary! I had hundreds of them because i thought it would make things look tidier without loads of patch cords all around the place!
I'm just uploading my Live Set as a template for people who just want to plug in and go however the Master and Slave Isotonik devices (Version 4.3) have been uploaded to max4live.com for anyone that wants to build them into an already existing template...
Place the master on track one, the slaves on 2,3 and 4 and then work through them sequentially....
Double click to load the device and then choose the rack that you want the right hand knobs to control, turn the knobs to the values you want to reset to and click the red record button.
Double click the 1st tab on the left hand knobs of the master and you'll take control of the 1st rack in each of your first 8 tracks of your live set. Pressing metronome and the track slects buttons will choose the paramater you want to control. Midi map these knobs to the pan bank on the APC and work through the parameters saving the reset values with the red record tab for the right hand set after recording press reset each time, this can be done by pressing metronome and master select on the APC. Once all 8 have been recorded and reset click the red record tab on the right hand set of knobs and this should save the values into the master preset.
Now repeat the process for each of the slaves with regards to loading and choosing the control of the right hand knobs.
To change the functionality of the stop clip buttons press metronome and the scene launch buttons, on the master device bring up the send control option as a floating window. As the "Fist" scene sends audio to up to 8 sends you can use this element to be a set of automap knobs to the send itself. Enable learn mode and set up what you want the knobs to control, i have the 9th audio track set up with 8 clips in it, with the numbers on the enable learn mode you want something like 9 1 1 which would be the 9th track 1st clip and 1st send. This will then take control of the rack in send one when you fire audio from the "Fist" scene to send 1.
To change the functionality of the Activator/Cue/Rec Arm buttons press metronome and a clip stop button. Most of the functions work currently apart from the EQ Kills which needs some work!
To change the global launch quantize and the behaviour of the follow action press the rec quantize button on the APC and use the clip stop buttons....
Thats it for now, unlikely to be another update as i've done my bit so thanks for the feedback!!
I'll continue to work on Lite versions with restricted functionality with the people on the list that have contributed......
Cheers
D
Re: [SHARE] Full DJ Template - Isotonik
Hi All,
I've just sent out emails to everyone on my mailing list for the links for my full dj template pre mapped and ready to rock with an APC40, if you would like a copy pm your email address and i'll send it across
Cheers
D
I've just sent out emails to everyone on my mailing list for the links for my full dj template pre mapped and ready to rock with an APC40, if you would like a copy pm your email address and i'll send it across
Cheers
D